How To: Build a Brake Rotor Forge
Please follow the below instructions and images for how to build yourself a solid fuel forge for less than $100 WITHOUT A WELDER. Most of the costs are in the plumbing and the electric blower but they can be sourced cheap.
You Will Need
Materials
- Brake rotor - I went to a local mechanic and asked if they had any brake rotors sitting around (most do from doing brake jobs and are willing to give them away).
- A 55 gallon metal drum
- 2" pipe fittings
- 1x 2" floor flange
- 1x 8" long 2" threaded nipple
- 1x 2" threaded T
- 2x 6"long 2" threaded nipples
- 1x Threaded 2" cap
Equipment
- Angle grinder
The Process
Build the firepot
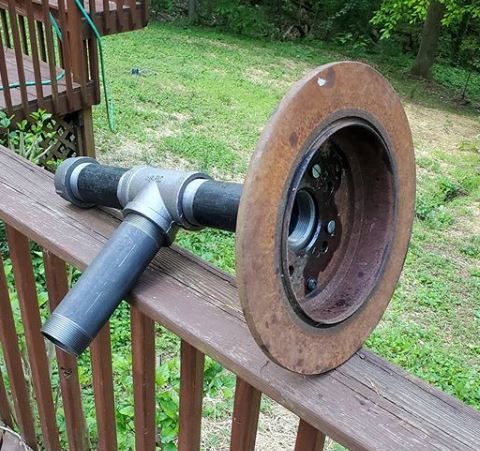
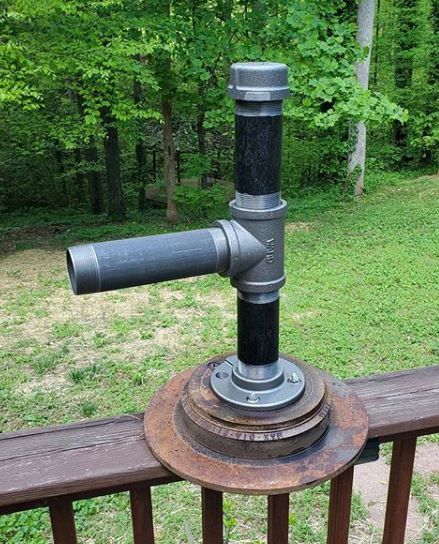
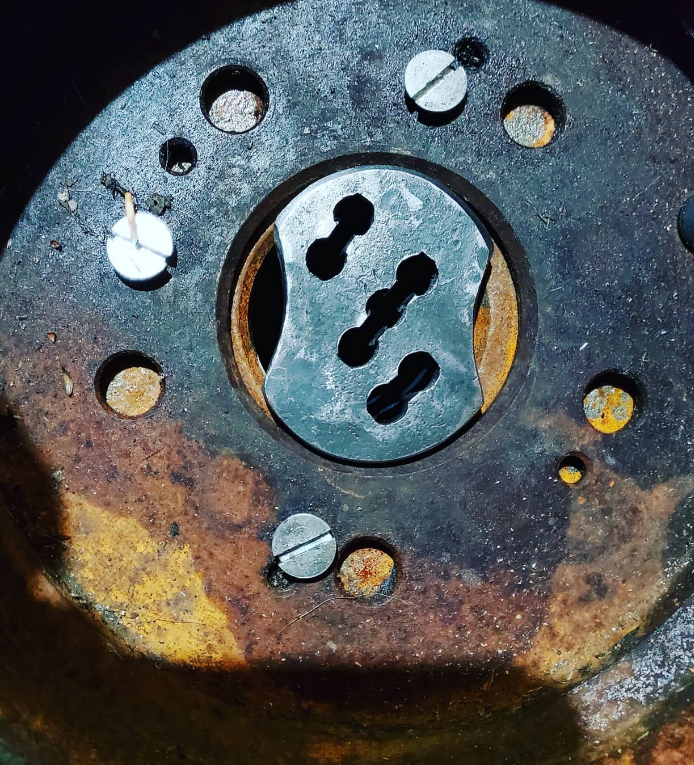
After getting my 2" threaded floor flange, i flipped the brake rotor with the flat side down and laid the floor flange on top to transfer the mounting holes from the flange, to the brake rotor. I drilled my 3 holes that I laid out from the floor flange on the brake rotor and secured the flange to the rotor with bolts. Then assembled the plumber as such in the following picture:
Build the forge table
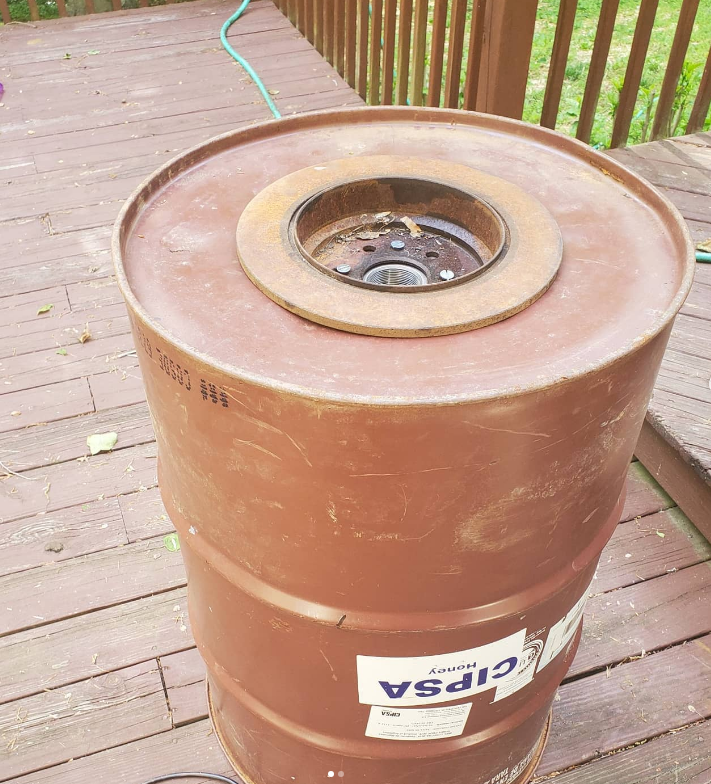
With the firepot built I turned my attention to the forge stand / table to gain height and stability. For this I obtained a standard 55 gallon barrel, flipped it upside down, and used an angle grinder to cut a hole in the bottom the same size as the inside of the brake rotor’s diameter.
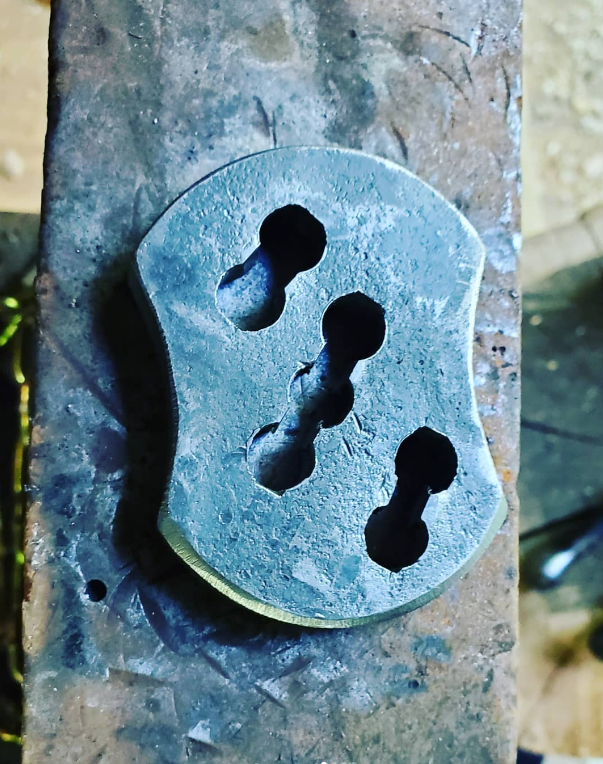
Fit the grate
I had a working gas forge so I forged out the grate to shape to pressure fit the open 2" hole in the brake rotor to avoid all my coal from filling up the pipe. If you dont have an existing forge, you can easily fabricate this with an angle grinder. Note the hour glass shape to allow maximum airflow to the bottom of the fire. This was forged from 1/2" plate but could be done as small as 1/4" plate. I drilled a series of holes in the plate and used a cold chisel to remove the webbing between eached drilled hole.
Configure air supply
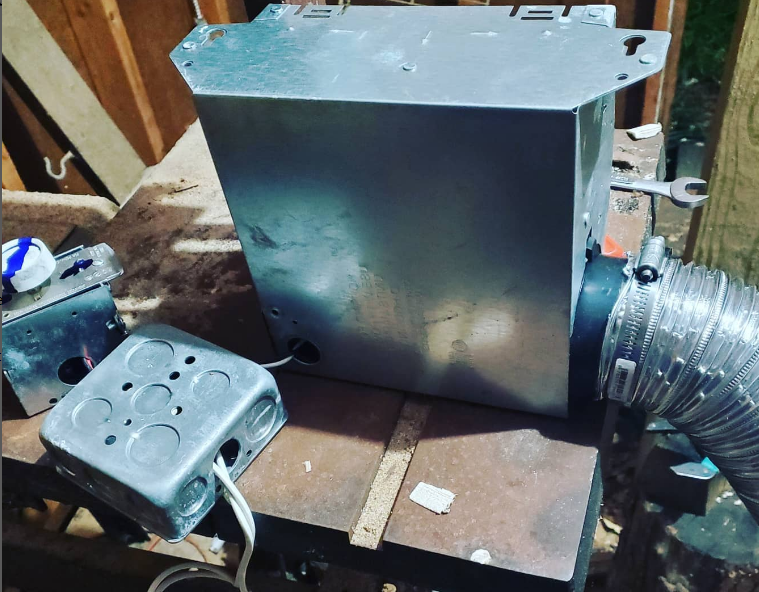
For a blower / air supply you can go as cheap as a used hair dryer to my method of a bathroom exhaust fan. I purchased the fan for I think $20 from home depot and also purchased a dimmer switch like you would use for a light switch. I wired the fan to the dimmer switch and put all my connections in a box to avoid damage to the connections and accidental harm.
Connect the air supply to the firepot
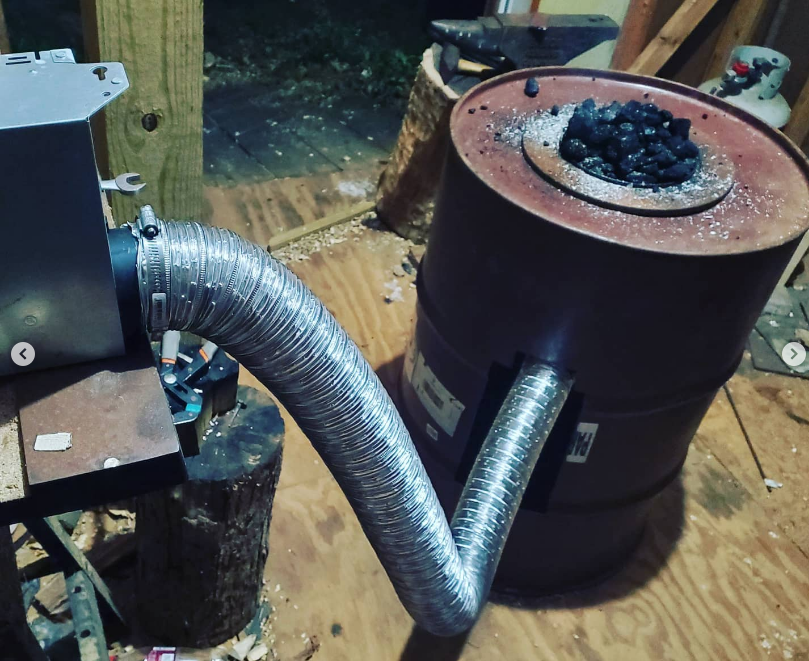
With the fan wired up and tested for functionality, all that is left is to attach the fan to the horizontal 6" nipple to provide airflow to the firepot. I used a simple dryer hose for this and hose clamps to keep the hose on the fan and the plumbing.
Please note the hole cut out of the side of the barrel to expose the air supply pipe and to be able to access the cap for ash disposal.
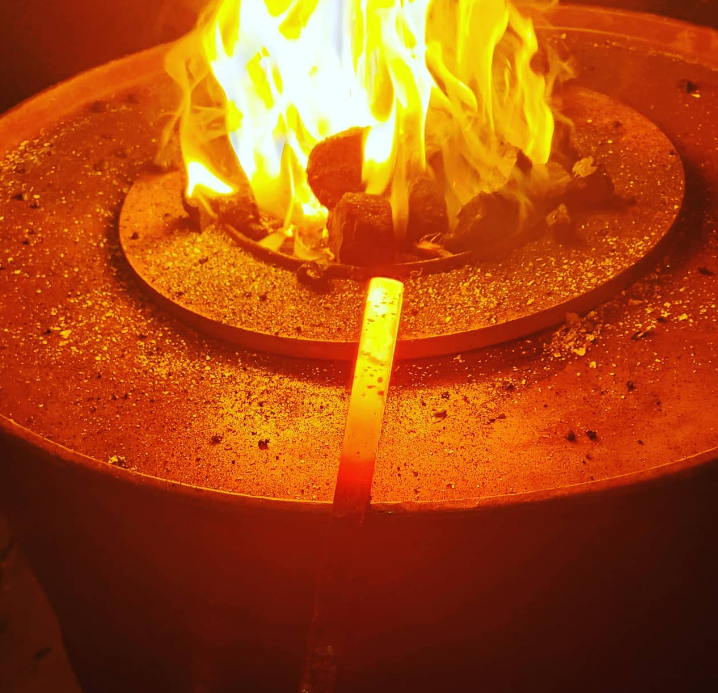
Try it out!
Now that you have a working fan, a firepot, and all your pipes connected together, you are ready to test it out! If you have never lit a coal fire, there are other sections of the wiki to assist in getting it going but I would suggest starting with very low airflow.